Tagged: DIY

The First Day of Third Grade Bento

Third Grade Puppy Lunch | OneCraftyThing.com

It’s the first day of third grade! I have to admit, it snuck up on me. We went abroad this summer and we’re still jetlagged so really, I feel like this minute it’s 3 in the morning. But alas, the kids are in school and the bigger kiddo is in third grade. CRAZY. I wanted to remind her that she has someone fun waiting for her at home, so I did a dog lunch for her today. We just got a puppy and the kids are insanely excited about her. So here’s to another year of bentos!


Main PB&J puppy shaped with with circle cutters and triangles for ears. The brown stuff is Nutella; the eyes are Wilton large eyes. The nose is a blueberry.
Sides Blueberries and a 3rd made out of cheddar. A chocolate chip protein bar I shaped into a dog bone.
Also included but not pictured Applesauce and water.


Today, I used:

Amazing Women Series: Coretta Scott King Bento

corettaSK

For this week’s Amazing Woman, I chose Coretta Scott King. Yesterday being MLK day, I thought Coretta was an appropriate choice, as without her, there would be no MLK day (she is the one who lobbied and won national holiday recognition for her husband). Also, Coretta was a leader and an activist in her own right and not just in reference to her husband. She did a world of good and I thought she was an amazing woman for the kiddo to learn about.

In today’s lunch, I put in a note about Coretta Scott King:

Coretta Scott King was a person who fought for all people to be treated equally. When she was young, she went to college to study music and then she became involved in peacefully protesting against those who wanted to separate people by the color of their skin. She married Martin Luther King, Jr. and with him, she changed the world we live in.

I’m still looking around to find a good book to continue the conversation with the kiddo about this amazing woman (so if you know one, put it in the comments, please!)

In this lunch:


Main PB&J with a portrait of Mrs. King in edible dough (this is a very thin piece) painted with food dye. It’s not visible here, but I have some luster dust in my decorating cabinet, so I put a tiny bit on her pearls for a bit of shine/contrast.
Sides Blueberries with mozarella music notes (to reference her music studies); a clementine with a peace sign written in Sharpie.
Also included but not pictured Yogurt and another clementine for an extra at snack time.


Today, I used:

Amazing Women Series: Sacagawea Bento

Amazing Women: Sacagawea | OneCraftyThing.com

For our second week of the Amazing Women series, I chose one of the most interesting of native women: Sacagawea (with a hard “g,” apparently). A girl, really, because she was only sixteen when she joined the Lewis and Clark AND a pretty kick-butt girl because she had a baby in the midst of the journey. In most lore, she is said to have lead the party but through a little research, I found that while she did lead them at times, she was mostly a skilled negotiator with tribes they encountered along their exploration, a good communicator having spoken several different languages, and a knowledgeable naturalist that could provide the party with wild plants that were edible or medicinal. She had a short life (25 when she died) but she had a great influence on American history.

This week’s book? Who Was Sacagawea?

In this lunch:


Main A cream cheese sandwich topped with a piece of mozzarella painted with her portrait (loosely based on her $1 coin) painted with food dye
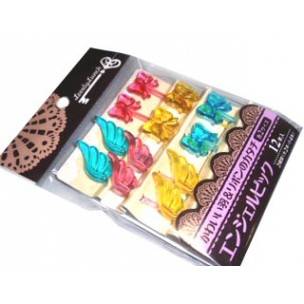
Sides Goldfish (representing the fish-heavy culture of the Shoshone people, to which Sacagawea belonged) and an orange with wing food picks (as her name translates into “bird woman”)
Also included but not pictured Yogurt


Today, I used:

Bento USA

Amazing Women Series: Marie Curie Bento

Amazing Women: A Marie Curie Bento | OneCraftyThing.com

Kickin’ off the new year with a girl empowering bento! My kiddo has gone into full-on science mode lately. We are in the middle of science fair and its her favorite subject. So to kick off my Amazing Women series with a Marie Curie bento!

Admittedly, thinking up stuff for this bento was a little hard. I did a little research on Marie Curie and she’s a hard person to do in a bread portrait! But then I figured out the wonders of painting her on the bread (with food dye and a brush!). It took a little time (about 15 minutes for the portrait), but it was a fun little project after the kiddos have gone to bed. Also, how do you explain the discovery of periodic elements to a second grader? I decided a quick post-it note would do the explaining:

Marie Curie was a great scientist who discovered two chemicals, called Radium (RA) and Polonium (PO). She also invented a portable x-ray machine that could be taken out to where it was needed. Marie Curie won two very important prizes in science. Her help and work helped future scientists with their work for a better world.

For fun, I bought her an age-appropriate book on Marie Curie, called Who Was Marie Curie? Hopefully, we can learn more about this fascinating woman.

In today’s bento:


Main A Marie Curie PB&J! 🙂 As mentioned before, I painted her portrait with food dye and a (food safe) brush.
Sides Black and green grapes (hinting at individual molecules) and the PO and RA are made out of cheddar. A half apple with a beaker carved into it.
Also included but not pictured Yogurt


Today, I used:

A Nutcracker Bento

nutcracker

This week we did some fun mom-kiddo bonding and I took the eldest kiddo to a truly beautiful production of the Nutcracker ballet. It was a Girl Scout event and it was really fun. She loved it, I loved that she loved it, and it spawned a really fun bento this week.

In this lunch:


Main Triple decker PB&J. For the red coat and a black hat and hair, a thin layer of edible molding dough, on top of the sandwich. A star sprinkle for a button and festive holly sprinkles adorn his hat. A graham cracker for the “fireplace” (with drawn-on flames) and a hanging cupcake topper stocking.
Sides Green grapes and a strawberry Mouse King with candy eyes (lids drawn on with edible marker) and almond ears, along with a licorice whip tail and sprinkle nose.
Also included but not pictured Yogurt, graham cracker bunnies


The Elsa Coupe

Every year, my playgroup gets together in a herculean effort to raise money for Relay For Life (an event for the American Cancer Society). We are super into the relay’s dress-up races, funny costumes and general silliness. And we’re a really competitive bunch, too, so we do all kinds of fundraisers and parties and such things getting ready for the event. My amazing friend, Alisa from Sweet Party Treats, is multi-talented and makes over Cozy Coupes to raise money for the event. This year, we are shamelessly riding the Frozen wave and thus was born the Elsa Coupe. Alisa painted the base color of the coupe and prepped it completely for me, and I spent a fun day at her house just painting, chatting, and generally being happy that Kiddo 3 adores my friend, so that I could paint in peace. This is how it came out. Sorry for the phone pictures; I didn’t think to take my camera with me… I strictly had painting on my mind.

The front:

elsa3

The side (it wasn’t completely done at this point, the steering wheel and the gas cap were being painted to match): elsa5

The Queen of Arendelle herself: Elsa4

And a fun detail we added: A curtain in the back of the coupe, that kind of looks like the bottom half of her dress. Elsa1

Hopefully this Cozy Coupe will go to an adoring Frozen fan and raise some money for a great cause. Hope they like it!

Ladybug, Ladybug

ladybugs

Today the theme was ladybugs… no particular reason why! My girls just love ladybugs. Also they remind me of summer and here in Northern California, it’s full on summer, because you know, it’s September (fall is summer here, summer is more like, well, fall-ish). Anyhow, I used some leftover carrot greens from my CSA box to garnish and I think it ended up pretty cute 🙂


Sandwich Triple stack PB&J
Side Apple ladybug with a fig for a head
Extras (not pictured) yogurt, an orange


Today I used:

Rainbow Roses

These last couple of weeks, the kiddos have been at home on summer vacation. We had intended on doing a lot of different projects and such but there were issues (an emergency root canal for me!) and so we didn’t do as much as I was hoping to do. Still, one of the things on the list were rainbow roses. When I was buying my mom flowers for Mother’s Day, I came upon these rainbow roses and thought, hey, I can do that! I thought it would be a fun project for the kids too. So here is how to do it:


How to make Rainbow Roses

I wish I had taken pictures of the whole process but it was hard to try to keep three kids entertained/included in the process and try not to cover everyone in dye. Basically what you have to do is:

  1. Cut the stems of the rose into several parts (I cut them into three parts because I wanted to use three colors).
    • One Crafty Tip: I cut the stems with a straight cut first underwater — this keeps air bubbles out of the flower’s stem, which can inhibit the uptake of dye. Then I took them out to cut on a cutting board with an exacto knife into three equal parts. I cut around 4 inches of stem. Put the rose back in the water.
  2. The next step is to prep your dye. I used regular food coloring that you can get at any supermarket (baking aisle). Some people put their dye in short, disposable cups (like the little paper dixie cups) but I figured the dye would be more  concentrated in less water, so I used teeny weeny soy sauce containers like this:
     
     
    I used plastic wrap to keep them all together. I also used a large glass container to keep the roses upright, as you’ll see below.

    • One Crafty Tip: Remember to buy containers that have a wide enough mouth to fit the stem.
  3. Wait. The Kindergarten Kiddo saw our first flower taking up the dye as we were cutting our second flower. It was very fast! The following results were from overnight.
  4. When your colors have been achieved, submerge stems underwater again and cut above your original cut. Place roses in fresh water and enjoy!
    • One Crafty Tip: You will see some of the dye leak into the water from the stems. It didn’t bother me any but if it does, I think the only way to avoid seeing it is to use an opaque vase.

So I started with white roses:

ROSE6j

The plastic wrap stems:

rose5

These roses were supposed to be blue, yellow, and magenta but for some reason, I didn’t have very good luck with the magenta taking well:

rose2

A close-up of my “best” rose:

rose1


You can see some of the leaking dye here:

rose3


These two were our less successful roses. The one on the left was supposed to be pink and purple (as per two giggly girls) and the one on the right was supposed to be red, white and blue but for some reason, none of it took (I did this rose twice, so it might have been the rose).

rose4


Stuff we learned (AKA, more Tips): 

  • The girls ended up learning about how water is taken up from the stem of the flower up into the petals. K-Kiddo even saw some green petals and concluded that the yellow and the blue colors mixed to get green.
  • I learned that the red dyes weren’t taking very well. Not sure why. I had two different types of red dyes (all from the grocery store) and still they weren’t very successful, especially in the ones that were supposed to be blue/yellow/magenta.
  • Young roses with less woody stems took up the dye much better than the bigger, woodier roses (the “patriotic” rose was a little bigger and woodier than the others). The fresher the rose, too, the better.

So there you have it! Rainbow roses. I think I might do it again although it gets a little pricey buying white roses… maybe we’ll try daisies or carnations next.


Today I used:

Super Mario Bento

mario

Admittedly, I sometimes make bentos that amuse me more than they amuse the kiddo. I mean it’s not like she doesn’t think they’re cute, but she doesn’t actually play Super Mario Brothers (she’s maybe played it once or twice), so these are mostly cutesy looking snacks and not the stuff of her childhood (although they are very much mine!). I would’ve made Mario but I kinda liked these little items instead.


Snacky Things Laughing Cow cheese, cherries, pita chips and cheddar stars. I added extra pita chips in another container because after I took the picture I figured the cheese-to-chip ratio was crazy in this one!


Today I used:

Robots!

robots


Today’s theme was robots, just because I’m in Sci-Fi type of mood 🙂 I can’t believe that Kindergarten is almost over, though. Two more weeks and we are out for the summer! Crazy!


Snacky Things Robot is made of pita chips and food safe markers; arms from pretzel sticks. Also included is a couple of wedges of brie (in the silver foil); In the “bots” container there is a snack trail mix with nuts and dried fruit. Cherries and nectarine slices as sides.


Today I used: