Search results for: Sushi

A Sushi Chef & Baby Ebi Sushi

Sushi_chef


I didn’t think about posting this because I just made it for Halloween but then a friend mentioned that I should put it up because some other babywearers could get ideas from it 🙂 So here is my costume for this year. I was a sushi chef and I covered a mei tai in white felt and stuck a giant shrimp on it and so my littlest kiddo became an ebi roll. It was great for a costume for him because he was just in a onesie and some (sushi print) pants and when he got tired, hot, or antsy of being in the carrier, I just took him out quickly and let him do his thing. Then when he was sleepy or hungry, back up he went 🙂

Sandwich Sushi, Take 2

sushi2

I don’t usually do bentos on Tuesdays anymore, but I had a request for a sushi bento (either with real sushi or sandwich sushi, the kiddo left it up to me) and since I didn’t have real sushi stuff on hand, I went ahead and did sandwich sushi. I’ve made a sandwich sushi lunch for her before but this time I varied it a little bit by  covering the “california rolls” in natural fruit roll ups. There was a specific request for “ebi nigiri” too, so I got a chance to put them in too!


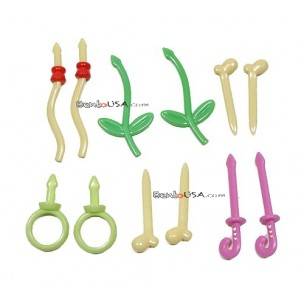
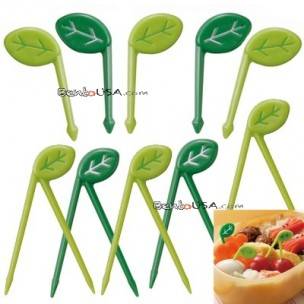
Sandwich(es) California rolls are made in the same way that sandwich cupcakes are made and then covered with fruit roll ups (natural variety) as skin. The pink and green filling inside is made out of a pink and green sunflower seed. The ebi nigiri is made out of PB&Jam sandwiches topped with orange slices and held together with fruit roll up. The tails are food picks.
Side Today’s side is just a little green tea jelly candy — my cousin gifted us a beautiful box of gorgeous Japanese candy and this was in the box and happened to look like wasabi. Not pictured, I also put in some fresh pears in her lunchbox as she has declared she loves pears 🙂


Today I used:

All Kinds of Easter Fun

Easter Bento | OneCraftyThing.com

I’ve been meaning to post this lunch since Thursday but I’ve been under the weather, so it’s going to be smooshed together in one of two Easter posts. I actually had planned a different lunch altogether with nothing but bunnies but you have to improvise when your bunny-shaped eggs won’t take well to the egg molds. So here we go, an Easter themed bento 🙂

In this lunch:


Main A cream cheese sandwich with a little mozzarella tail. In the baking cup, cheddar bunnies.
Sides  An egg cut to look like a chick — actually, it was supposed to look like a rabbit but oh well. The chick has a piece of carrot for the beak and sprinkles for the eyes and sushi grass around it. Also a blueberry carrot “patch” consisting of baby carrots (with dill for the greens) simply set into blueberries.
Also Included but not Pictured String cheese and a banana


Also in this post, the kiddos’ Easter eggs! We had lots of fun with the rice dyeing method of coloring Easter eggs that even the two year old kiddo did it and did it well. It was really simple.

Speckled Rice Dyed Easter Eggs (with Tutorial!) | OneCraftyThing.com

You need:

  • Containers with lids, or, alternately, disposable cups and tin foil/plastic wrap, or whatever will cover the top completely.
  • 1/4 cup of rice for each container
  • Food dye
  • Hard-boiled eggs

And the (super easy) instructions:

  1. Pour the 1/4 cup of rice into each container (we used cups because we had recycled our containers already).
  2. Place 15-20 drops of dye in each of the colors you want.
  3. Place hard-boiled egg inside and cover the top with lid or foil/plastic wrap
  4. Shake vigorously (or until you giggle).

And that’s it! That’s all. Some tips we learned:

  • The sooner you put the eggs in after you put the dye in, the more vibrant/more colored your egg will be.
  • For speckled eggs, dye the rice and wait 15 minutes to 1/2 hour. When we first started our project, we put the dye into the rice and were shaking up the rice and then Dad came in with our take-out dinner, so we had to wait to dye the eggs. The result was speckled eggs because with the time we gave it, the dye had absorbed more into the rice.
  • You can put them in different colors after each layer is done. Each kiddo was given 3 eggs (so few because only ONE of the three actually eats hard-boiled eggs) so to keep the activity going, we put them in different colors. I think the ones my eldest kiddo did were the loveliest, with the “Monet-inspired” one seen below as my favorite 🙂
  • For younger kids, I’d use the lidded containers. My kids used the tin foil and shook them so hard that some ripped through the top and lost some rice, getting it pretty much all over the table. So much for a no-mess activity!

Here were the best of the best, done (in order)  by eldest kiddo (7), youngest kiddo (2), and middle kiddo (4). Love that we got such great results by putting them in different colors. The layered approach was really great.

Speckled Rice Dyed Easter Eggs (with Tutorial!) | OneCraftyThing.com

Today, I used:

Temarizushi and the Unphotographed Maki

temari

So once in a while (actually more than once in a while) I succumb to the siren song of Pinterest. You know when you see a pin and it looks SO fabulous, SO amazing, SO…easy. I saw such a pin. I was happily scrolling around my Pinterest main page when I saw it — “How to make California Rolls” posted by either Martha Stewart or Spoonful (Disney kids’ online magazine). You know, those people (companies? entities?) have beautiful photography and lighting set up and a lady who looks like a typical (well-kept, neat) mom (always with amazing hands — oh the hand models!) jauntily and happily rolling up a california roll with a smile that so very obviously says, “Oh yeah, I got this. My kids will be thanking me in Japanese tonight!” Well, I’m here to tell you one thing.

It’s all a lie! Or, you know, just really good photography.

So I get it in my head that I want to make California rolls for my California roll-adoring daughter. My Kiddo1, she LOVES Cali rolls. She would rather go to sushi than any other restaurant (including the ones that give out toys with the meal!) and I spend DAYS watching videos on youtube, gathering supplies from different places, deciding that I would make maki for the children and for the more adult, discerning palates I would make nigiri with salmon. I ended up over-researching this and, a bit intimidated, start to make the maki.

I’ve survived the experience but not unscathed. It was an ugly, terrible ordeal. The rice was ok but really really sticky (yes, obviously, as it is sticky rice) and for some reason my stuffings kept falling out of the insides (my rolling technique?). My nori sheets seemed like they were getting too moist, the imitation crab (for safety reasons for the kids) was grossing me out and I didn’t have a knife sharp enough to slice through in one cut (which I learned was absolutely essential as per a youtube restaurant owner). The kiddo1 was gracious enough to try two maki rolls (one without mayo and one with — ugh don’t ask, some guy on youtube convinced me it would be amazing… sorry man, it was really NOT good) and to lovingly tell me that they were good but that she didn’t want to eat more because she wasn’t hungry… but she left with a naked crabstick in her hand that told me otherwise. Ugh. Two rolls later and the kids weren’t hiding the fact that they couldn’t get enough of the crabsticks and eating them straight from the package, I wasn’t hiding the fact that the whole process was not going according to plan (thus driving me crazy) and my husband WAS hiding the fact that he could tell I was going to make the biggest mess in the kitchen since my highly detailed dragon bento of earlier in the year.

Sigh.

I gave up on the maki after that, a bit bummed that it didn’t work out. It was so bad that I thought to take pictures too late, after the kiddos had ransacked all of the rolls for the crabsticks, leaving their sad, seaweed shells behind 😛 They were so bad, they probably would’ve cracked the camera lens anyway.

Unenthused, I moved on to the nigiri which I had decided to make into temarizushi. Temarizushi is sushi that looks like balls rather than the usual rectangular shape. It’s actually the easy way to do it since the regular way requires skill and talent. I was going to do a tutorial but then I just thought, hey, I’ll link up the tutorial that I used. They did come out much prettier, which is why they got a glamour shot up in the beginning of this post. Unfortunately, I too had been eating while I was making the rolls (comforting myself ) and so I lost my appetite for sushi for tonight. I made them, photographed them and presented them all pretty to my husband. In return, he took the rest of the salmon that I just couldn’t bring myself to make into sashimi or nigiri and cooked it up for me with veggies. Good husband, will keep.

Super Mario Bento

mario

Admittedly, I sometimes make bentos that amuse me more than they amuse the kiddo. I mean it’s not like she doesn’t think they’re cute, but she doesn’t actually play Super Mario Brothers (she’s maybe played it once or twice), so these are mostly cutesy looking snacks and not the stuff of her childhood (although they are very much mine!). I would’ve made Mario but I kinda liked these little items instead.


Snacky Things Laughing Cow cheese, cherries, pita chips and cheddar stars. I added extra pita chips in another container because after I took the picture I figured the cheese-to-chip ratio was crazy in this one!


Today I used:

Leopard (Cheetah?) Bento

leopard

Last night, I asked my kindergarten kiddo what she wanted for a bento today. She thought about it and said that we had never done a cheetah before. So I took the challenge. Cheetah it was… and I knew what she was thinking — a leopard print. I couldn’t convince her that cheetahs only have spots, so while I call this a leopard lunch, she says it’s a cheetah. Whatever, I hope it’s yummy 😉


Sandwich The usual PB&J on whole wheat. The spots are drawn on with food safe markers and the little grass on the bottom is just sushi grass.
Sides My kiddo loves these little cutie oranges and so I’ve been trying to use them up because we bought something like 8 pounds of them! So a “cutie” orange leopard with sprinkle eyes, M&M nose and marshmallow muzzle. Spots drawn on with edible marker. In the little container, shelled pistachios because pistachios are just awesome.


Today, I used: